Angular 19 was an amazing release and shipped great features. One of them is the LinkedSignal. The tl;dr version is that LinkedSignal is similar to the computed function, with the difference that the computed returns a read-only signal, whereas LinkedSignal returns a writable signal. Let’s dive a bit deeper to understand what it is and how to use it.
The syntax
To explain the syntax, let’s see an easy-to-digest example.
Let’s assume that we have a list of items, and we want to derive the count of this list.
listOfItems = signal(['item1', 'item2', 'item3']);

countOfItems = linkedSignal(() => this.listOfItems().length);

// countOfItems = computed(() => this.listOfItems().length);
The syntax here is similar to the computed one, where the state is derived from the source signal. Like we said at the beginning of this article, the difference with the linkedSignal is that we can change the derived value:
changeTheCountOfItems() {
    this.countOfItems.set(0)
}
Let’s now do the same but with a different notation:
countOfItems = linkedSignal({
    source: this.listOfItems,
    computation: (items) => items.length,
});
In this notation, the source accepts a signal reference, and when this signal value changes, the computation function is invoked.
Irrelevant to the notation, if the listOfitems has 3 items, the countOfItems will return the value 3. If we add an item to the listOfItems this.listOfItems.update((items) => […items, ’item4′]) we expect the countOfItems dynamically to change to 4.
At first glance, it seems that we can achieve the same with two different implementations and that the short notation is a syntactic sugar. Well, this is not the case. Till the end of this article, you will see different use cases where you’ll also learn what the differences are between these two notations.
Use Case – Signal Input
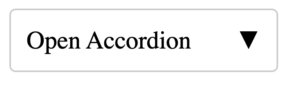
The input signals are non-writable signals but still, there are some cases where we need to update their value. Let’s see a short example of a custom accordion component where we should toggle its state when we click on it.
Close State
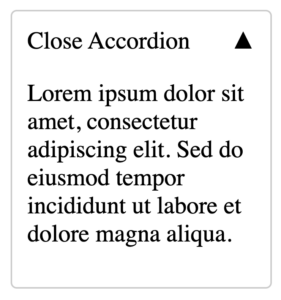
Open State
Code – Accordion Component
@Component({
  selector: 'app-accordion',
  template: `
    <div class="accordion">
      <div
        (click)="toggle()"
        [class.chevron-down]="!isOpen()"
        [class.chevron-up]="isOpen()"
      >
        {{ isOpen() ? 'Close' : 'Open' }} Accordion
      </div>
      @if (isOpen()) {
        <div class="content">
          <p>
            Lorem ipsum dolor sit amet, consectetur adipiscing elit. Sed do
            eiusmod tempor incididunt ut labore et dolore magna aliqua.
          </p>
        </div>
      }
    </div>
  `,
  styles: `
   // I omitted the styles for brevity
  `,
  changeDetection: ChangeDetectionStrategy.OnPush,
})
export class AccordionComponent {
  isOpen = signal(false);

  toggle() {
    this.isOpen.set(!this.isOpen());
  }
}
To accomplish the open/close, we keep the state in a writable-signal variable with name isOpen. This works well, but what if we want the consumers of this component to define its initial state (open/close)?
A consumer might need the default state of the accordions to be open, while others might need the default state to be close.
To allow a consumer to interact with a component, we need to convert the isOpen to a signal input. But note, the signal input is a non-writable one which means that we will fail changing the state from the HTML template. For that reason we need to utilize both a signal input along with a linkedSignal
Code – Accordion Component with linkedSignal
export class AccordionComponent {
 readonly isOpen = input(false);

 state = linkedSignal(() => this.isOpen());

 toggle() {
   this.state.set(!this.state());
 }
}
In the code above:
- we are converting the isOpen to a signal input
- we create a writable-signal state by deriving its value from the isOpen signal input
- we toggle the state signal value and we are using the state and not the isOpen in the HTML template
Final HTML template
<div class="accordion">
  <div
    (click)="toggle()"
    [class.chevron-down]="!state()"
    [class.chevron-up]="state()"
  >
    {{ state() ? 'Close' : 'Open' }} Accordion
  </div>
  @if (state()) {
    <div class="content">
      <p>
        Lorem ipsum dolor sit amet, consectetur adipiscing elit. Sed do
        eiusmod tempor incididunt ut labore et dolore magna aliqua.
      </p>
    </div>
  }
</div>
This change makes sure that we don’t modify the original value, while still keeping everything updated correctly.
Use Case – Conditional Derived State
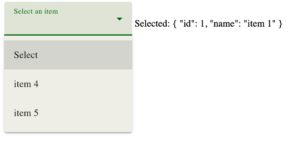
Let’s see another simple example with a drop-down list where the items could change in the runtime from an HTTP call (or whatever data-source)
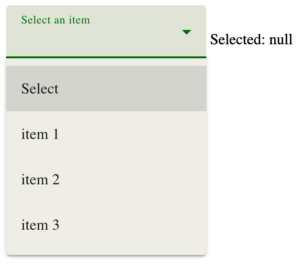
In the image above we do not have any selected item that’s why Selected has the value null.
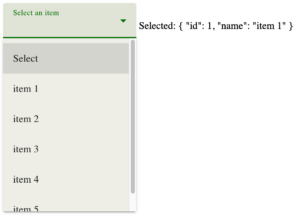
If we select an item, we expect to have:

Let’s now see the code and progressively we will suggest more changes.
component.html
<mat-form-field appearance="fill">
  <mat-label>Select an item</mat-label>
  <mat-select [(value)]="selectedItem">
    <mat-option [value]="null">Select</mat-option>
    @for (item of listOfItems(); track $index) {
      <mat-option [value]="item">
        {{ item.name }}
      </mat-option>
    }
  </mat-select>
</mat-form-field>

Selected: {{ selectedItem() | json }}
component.ts
selectedItem = signal<Item | null>(null);

listOfItems: WritableSignal<Item[]> = signal([
  { id: 1, name: 'item 1' },
  { id: 2, name: 'item 2' },
  { id: 3, name: 'item 3' },
]);
The code is straightforward. The selectedItem signal is responsible for keeping the selected state and the listOfItems signal array represents our data source.
Let’s assume that the data source dynamically changes via an HTTP response and that we want to clear the selectedItem state if the new data do not contain the selected item. In other cases, we want to keep the state as is.
We will introduce two methods that will play the role of the HTTP
changeTheItemsIncludingTheDefaultOnes() {
  this.listOfItems.set([
    { id: 1, name: 'item 1' },
    { id: 2, name: 'item 2' },
    { id: 3, name: 'item 3' },
    { id: 4, name: 'item 4' }, // introduced item
    { id: 5, name: 'item 5' }, // introduced item
  ]);
}

changeTheItemsExcludingTheDefaultOnes() {
  this.listOfItems.set([
    { id: 4, name: 'item 4' },
    { id: 5, name: 'item 5' },
  ]);
}
The methods are self-explanatory. The first one will introduce two more items by maintaining the previous items, while the second will introduce only new items.
Let’s give it a try!!
# 1st example:
Let’s select an item from the select menu and then invoke the changeTheItemsIncludingTheDefaultOnes
In this scenario, we want item 1 to remain selected since the incoming source includes this item.
As seen in the above image, things didn’t work as expected ❌
We have the selected state, but the selection in the menu is missing. This happens because the menu tracks selected items by comparing the object reference and we have just introduced new object items.
# 2nd example:
Let’s select an item and then invoke the changeTheItemsExcludingTheDefaultOnes
In this scenario, since the source of data won’t include the selected item, we want to remove the selected item from the select menu and we also want to clear the selected state.
Again, as seen in the above image, things didn’t work as expected ❌
The selected item is not on the select menu, but the selected state is still there.
The Problem
The issue in both cases is that we are not managing the selectedItem properly.
The Solution
The solution obviously is to handle the selectedItem properly 🙂
 // selectedItem = signal<Item | null>(null);

  selectedItem = linkedSignal<Item[], Item | null>({
    source: this.listOfItems,
    computation: (items, previous) => {
      return items.find((item) => item.id === previous?.value?.id) || null;
    },
  });
The trick here is happening in the computation function. Every time the listOfItems has a new value, the computation will be invoked with two arguments. The first one is the raw data of the signal source, while the second one has the state of the previously selected values.
linkedSignal with multiple sources
You might wonder if we can use linkedSignal with more than one signal source. The simple answer is „Yes.” Let’s see what the API declaration looks like:
export declare function linkedSignal<S, D>(options: {
    source: () => S;
    computation: (source: NoInfer<S>, previous?: {
        source: NoInfer<S>;
        value: NoInfer<D>;
    }) => D;
    equal?: ValueEqualityFn<NoInfer<D>>;
}): WritableSignal<D>;
The source: () => S is a function that returns the S type. This means that we can provide as many sources as we like.
I do not have a concrete example to showcase, but we can create some imaginary requirements. Let’s assume that we have two signal sources where each one returns a number. We need to return the result of the numbers using a linkedSignal
I know, it’s not a perfect example and it’s definitely not something that we would use in a production system. But still, it is enough to experiment.
signalSourceOne = signal(1);
signalSourceTwo = signal(2);

singleFromMultiple = linkedSignal<
  { sourceOne: number; sourceTwo: number }, // type of the source
  number // type of the return value
>({
  source: () => ({
    sourceOne: this.signalSourceOne(),
    sourceTwo: this.signalSourceTwo(),
  }),
  computation: (data) => {
    return data.sourceOne + data.sourceTwo;
  },
});
The linkedSignal accepts two generic types. The first type is the source, while the second is the return value. In our case, the source is the object {sourceOne: number, sourceTwo: number} and since we are returning the result of both, the return type is number.
Into the source function, we return an object where each property holds the value of the signal (note the parenthesis). If this is a bit confusing, let’s rewrite the selectedItem of the previous example to use the same notation:
selectedItem = linkedSignal<Item[], Item | null>({
  source: () => this.listOfItems(), // we return a function
  computation: (items, previous) => {
    return items.find((item) => item.id === previous?.value?.id) || null;
  },
});
At the time of writing this article, this feature is under a developer preview but this shouldn’t stop us from trying this out.
Thanks for reading my article!